Monday, 28 August 2023

Snow White - AKA Xavier
 
Rapunzel - AKA Aria


Hello all,

Last week was Book Week at my grandchildren's school. Most of the children dressed up as a character from a book and, in the afternoon, took part in a parade. I made costumes for Aria and Xavier, something I enjoyed immensely. I went to the school parade, filled with pride for my grandkids. Each grade took turns to walk around the oval. Xavier's grade was last, being grade 6. When he nearly finished the walk, he took a bite from the apple he was carrying and promptly fell down 'unconscious', to resounding applause. Shy and retiring he is not!

At our recent Ikebana International AGM, as is the custom, the 5 heads of schools demonstrated an arrangement each. Please go to II Melbourne for more information and photographs of the 5 arrangements as well as photos of works by members. 

We did not have a theme for our arrangements. The previous day I had been clearing up some of the philodendron patch which is threatening to overtake half my garden. One of the leaves had an interesting curve, perfect for an arrangement for the meeting the following day. I removed the bulk of the leaf, then thinned out what was left to lighten it. I had a long kenzan inside the container but it was not enough to support the heavy leaf. I placed a stick horizontally from the left side of the container and wedged it against the thick stem of the leaf. It worked a treat.


 Below is the side view of the arrangement because the curve of the stem, which is the main feature of the piece, can't be appreciated just from the front view.


In the philodendron patch I found other materials that were, also, suited to ikebana. I treated the leaf in the next arrangement the same way as the one above but, this time, I used two, unripened, philodendron fruit to complete the arrangement.


For class last week I had set a rather challenging exercise for the advanced students. It was a combination of two themes - 'In a Suiban without a Kenzan' and 'With Leaves Only'. I have to admit that we all struggled with our arrangements and some colourful expletives were heard but, in the end, we all managed it and felt a real sense of achievement.

Below is my arrangement. I used New Zealand flax, monstera deliciosa and arum lily leaves in two, triangular suibans. The arum lily leaves I folded and pinned to create a tighter design.


Cym's glossy, purchased leaves had rather short stems so she struggled a bit to get them to balance but she managed it. Three aspidistra leaves added to the design. This arrangement could be viewed from all sides.


Jenny used strelitzia reginae leaves with a couple of pinky coloured flax leaves, which picked up the colour of the spine of the strelitzia leaf.


 Nicole, also, used New Zealand flax, strelitzia reginae leaves and a single, shredded aspidistra leaf.


In a large, round suiban, Vicky used gymea leaves and a single, partly shredded strelitzia reginae leaf.


Lucy used philodendron leaves, which she reduced greatly. She also used a strelitzia reginae leaf from which she removed some segments then added two pinky coloured flax leaves.


Dianne's curriculum theme was 'Composition of Surfaces by Using Leaves'. She used large, variegated flax leaves and Kamo-hon-Ami camellias.


Lei's Curriculum theme was 'Jumonji-dome (Cross bar fixture). She used pine and Geraldton wax, which related beautifully to her ceramic vase.


Wendy's lesson was 'Using both fresh and unconventional materials'. She used polystyrene to create a geometric design, which she placed over a cylindrical vase and added, for the fresh materials, Japanese flowering quince and daffodils. 


Mary's theme was 'Miniature Ikebana'. Always a fun exercise.


Bye for now,
Emily


Monday, 21 August 2023

GAAD WORKSHOP


Hello all,

Last Saturday I conducted a workshop and demonstration organised by GAAD (Greek Australian Artists' Directory). I was assisted by Vicky, who's very experienced at helping to make my demonstrations run smoothly. We, also, had the company of my granddaughter, Hermione, who took part in the workshop and did a really good job.

Below is a photo of the three of us beside Hermione's arrangement.


We were a small but enthusiastic group. I, first, demonstrated the Basic Upright arrangement, being the very first lesson in our curriculum. I had provided containers, kenzans and materials to the attendees to make their own arrangement. I found prunus blossoms on trees growing along the road and thought it was a great opportunity to use them in the workshop. For flowers we used chrysanthemums. With a little help from Vicky and me, they all made very good arrangements.


I, then, proceeded to demonstrate seven freestyle arrangements.

In the first I used two haemanthus lily leaves and a single protea in a ceramic container.


In the second I used a branch of my stachyurus praecox, whose pendulous flowers were not as open as I would have liked but I used it anyway. I placed it in  yellow vase, which picked up the colour of the flowers. The Brushfield's yellow camellias seemed well suited to complete the arrangement.


In the third arrangement (pictured at the top of this page), I got the opportunity to use a couple of cymbidium orchid stems, which were given to me by my student, Bredenia. Much as I love them, I find these orchids rather hard to use in ikebana as they are very rigid. Placing them in a kenzan doesn't always work because they are quite heavy. In my arrangement I used some black coloured, spear grass for design but also, to act as support for the flowers.

When I cut the protea from my son's neighbours' tree for the first arrangement, I saw a couple of flowers with curved stems that, simply, had to be cut and arranged. Apart from trimming the superfluous leaves, my only other task was to choose a container. I tried a few before settling on this curved, ceramic one.


An Ikebana demonstration would not be complete without a basket arrangement. The materials used in a basket arrangement should be light for balance, both visual and actual. I've been watching these bromeliad flowers and was hoping they would be open in time for this demonstration. This bromeliad is called Queens Tears (Billbergia Nutans) and, with its pendulous form, it's ideal for a basket. The variegated leaves are from the plant Arum italicum pictum.


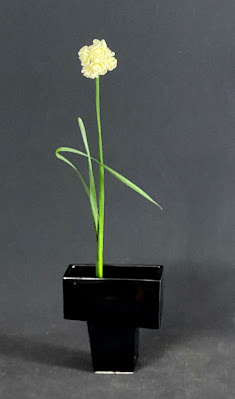
I grow jonquils very successfully because I go to the trouble of digging them up after each season and then replanting them in autumn. My husband, Sam loves them for their fragrance and I always have some in a vase on his desk. I, particularly, like working with their leaves. I wire them and then I'm able to shape them in interesting ways. I demonstrated this technique for the group.


For the demonstration of the next arrangement I used a much loved, stainless steel vase. I commented on how versatile a metal container can be because it is light and unbreakable. Ironically, when I got home the base of the vase had broken off. 

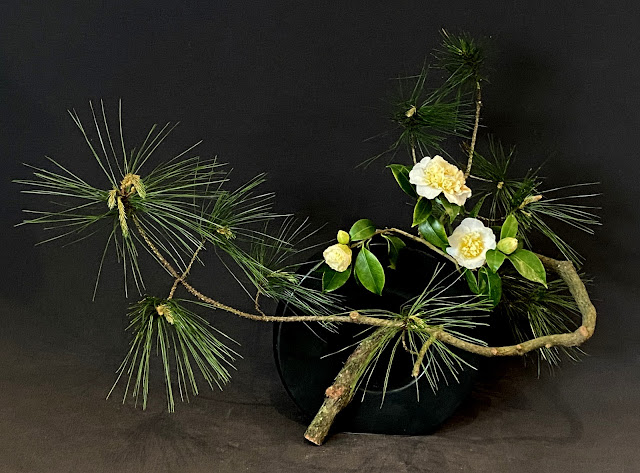
I had reset all of the arrangements when I got home so that I might photograph them against a plain background. I replaced the broken, metal vase with a ceramic one for the reconstruction of the arrangement. I used a single piece of pine (pinus radiata), to which I had attached a long stick to go inside the vase and hold the pine in place. I then added some brightly coloured camellias to complete the piece.


Mary' lesson this week was Miniature Arrangements. Everyone seems to have fun with this theme and Mary was no exception.


Bye for now,
Emily


Monday, 14 August 2023

MASTERCLASS #17

Bredenia's condolence gift arrangement


Hello all,

The above arrangement was made by Bredenia. Instead of the set task for the Masterclass, she requested to make an arrangement to take to friends when paying them a condolence visit. In a tall vase she placed florists' foam and attached a dried, sprayed branch, then added cymbidium orchids and alstroemeria psittacina leaves.

Saturday's masterclass was quite challenging for the attendees. I had provided for each of them a large branch of pine (pinus radiata), which I left outside, as they were too big to work on indoors. After studying the branch, they trimmed it to manageable proportions and brought it into the studio. There they each selected a container and proceeded to create the base of their arrangements. Once they were satisfied with the placement of the pine, they went into the garden and cut camellia branches to use with the pine. This was an important part of the exercise because cutting the correct stems will make placing them easier. Camellias are not an easy material to work with and require some skill and experience to arrange them correctly.

Jenny kept her branch quite large and opted for a tall stove pipe container. To secure the branch onto the container, she used a vertical fixture onto which she screwed the branch. She was, then, able to place the camellias comfortably whilst maintaining the asymmetry.


Vicky removed side shoots from her branch, revealing the curved stem that sweeps from the top of the container towards the front. She used Brushfield's yellow camellias to complete the arrangement.


Cym kept only two tufts of pine needles on her branch, having removed all the others. Interestingly, she did not remove the superfluous pine needles along the stems, as we normally do but the work looks good. It reminds me of Iemoto's comment that 'There are rules and then there are exceptions'. Cym used two different kinds of camellias but in the same colour.


In contrast to Cym, Christine really went to town with her trimming. She said once she started, she couldn't stop. She removed all but the very tips of each side shoot, emphasising the lines of the stems. With her heavy container, she needed the strong, variegated, red camellias for balance.


Akemi was less severe with her trimming and placed her branch in a tall vase, making sure that the large pine cone was prominent. She kept her branch quite naturalistic. I, particularly, like the lower, three tufts because they remind me of ballerinas in long tutus.


Midori, also kept her arrangement very naturalistic. She used a ceramic container in the shape of a basket with a twisted willow handle. She utilised the split in the container for placing her stem and made sure that the handle was not obscured.


Lucy started off with a very big branch with a thick base. She removed the bulk of the pine branches leaving only the base and a couple of thin, curved stems. She chose a large, glass container which was, before it broke, in the shape of a martini glass. The jagged edges at the top helped to secure the branch. Being a glass container, Lucy was careful to conceal the camellia stem behind the thick pine  when placing it in the water.


As I was cleaning up after class I found a piece of pine that I couldn't throw away. The vase that I chose has three holes midway and upwards on either side. I fed the stem of the pine through one of the holes, then used a horizontal fixture to hold it in position. I, then, added the kamo hon ami camellias in the space that was created, being careful not to fill the whole space.


A small explanation about the direction of the pine needles in the various arrangements. The girls were very careful to make sure that all the stems were placed correctly, that is in the way that they grew on the tree. It is flowering season for pines and their clusters of flowers grow upwards, whereas the needles point down. In some cases, on the same branch, some of the tufts of needles will point upwards and some down.

Bye for now,

Emily


Monday, 7 August 2023


Hello all,

In the arrangement, above, you could be forgiven for thinking I used painted wisteria but you would be wrong. The material is red dogwood (cornus Siberica alba), whose stems turn a deep red colour in winter when its leaves are all gone. Two or three years ago I had twisted some long stems around  a thicker one to create these shapes. I had forgotten about it but discovered it recently, to my great delight. Unwinding and removing the curved stems was quite challenging as they are quite thick and difficult to bend and there were many side shoots that had to be removed first amongst the tangle that is this shrub.

Having created the structure, I was looking around for flowers to put with it when I noticed my neighbours' red hot pokers (kniphofia 'Winter Cheer'). They were a little past their best but they had to do because I had nothing else in my winter garden. When I asked Marisa if I could have a couple, she gave me three. I'm blessed to have generous neighbours.

Below is the announcement for a workshop that I will be running, which was organised by GAAD (Greek Australian Artists Directory). Initially, I will demonstrate a number of arrangements and, then, I will demonstrate the Basic Upright, being the first lesson in the Sogetsu curriculum. Participants will be provided with containers, kenzans and fresh materials to complete their own arrangement. If anyone, who is not already taking ikebana lessons, would like to try their hand, this would be an ideal opportunity. The person to contact is Catherine Alexopoulos - cathopoulos@gmail.com


Mary's lesson last week was 'Glass Containers'. The curve on the kniphofia stems dictated the arrangement.Its simplicity belies the difficulty in creating it.


Dianne's lesson was 'Mass and Line'. She used prunus branches for line and leucadendrons and nandina domestica berries for the mass, in a ceramic container.


Wendy's lesson was 'Vegetables and/or Fruit in an Arrangement'. She used kale, brussel sprouts, chilies and a stem of flowering prunus. She placed her materials on a wooden tray with a woven surface and had a small container for the branch to be in water.


Lei's lesson was Japanese Narcissus. She followed the instructions in Book 5 to remove the leaves and flower from the sheath, rearrange them and put them back into the sheath. She, then, created this simple but beautiful arrangement...


...but that didn't satisfy Lei, so she made a
nother, quite delightful arrangement using miniature narcissus and spider plant (chlorophytum comosum). Her container had us all drooling.


Shaneen's lesson was 'jika-dome (direct fixing). In a glass vase she placed pittosporum branches with white leaves. This is an aberration probably due to shade. She also used yellow narcissus and small flowered leucadendron.


For the advanced students I had set the theme Kakebana, Tsuribana. Kakebana is a wall arrangement and tsuribana is a hanging one. 

Vicky's kakebana was made using a small, round, ceramic container in which she placed red dogwood branches, pieris and clivia nobilis.


Bredenia made a hanging arrangement in a basket and used narcissus and asparagus fern trailing down.


Nicole also made a wall arrangement using a basket designed for that purpose. She used prunus branches in bud, rhododendrons and jasmine.


Lucy used for the first time a wall container which is a much treasured gift. It is a long and thin, wall container made by Kid Ching, one of our members and a ceramicist of some repute. She used nandina domestica, euphorbia, aspidistra leaves and an orchid that she grew herself.


Because I make a wall arrangement every week in the entry of our house, I chose to make a hanging one. This bamboo container is ideal for the task. I used hellebores and crucifix orchids with curved stems. Unfortunately, the hellebores didn't last very long. Next morning they were drooping down. The biggest difficulty was finding a place to hang it without a busy background. Photographing was made even more difficult by the spinning of the arrangement.


I leave you now because the Matildas are playing Denmark and half time is finishing. Here's hoping they're as successful as last week.

Bye for now,
Emily


Tuesday, 1 August 2023

ONE LAST HURRAH


Hello all,

I'm writing this quite late at night because I got caught up watching the Matildas beating the Canadian team convincingly. This from a woman who has never watched sport except to see her grandson play basketball. So, please forgive any mistakes, they are due to fatigue.

The painful process of decluttering my storerooms is continuing, albeit at a snail's pace. Everytime I pick up an item to discard, I change my mind and put it back. I realised that this was a wasted exercise so I made a deal with myself to make one more arrangement with each piece before it is  discarded. Some of these materials, buried in the bowels of my storerooms, have not seen the light of day for decades, so it felt like I was using them for the first time.

In the arrangement, above, I used a piece of very old bark from some kind of eucalypt, which hung from the ceiling of my storeroom for decades. I placed it in a ceramic container with splits on each side and added Brushfield's Yellow camellias.

It was a long time ago but I remember my delight at finding the rusty piece of metal, below. I used a ceramic container and pink (unnamed) camellias.


The thin, rectangular piece of metal in the next arrangement hung around in my studio and was picked up only to be put down, again and again. Finally, I used it in a triangular container with narcissus flowers and leaves. The leaves have been wired to facilitate creating the angles. White on white doesn't photograph well but, if I had used a dark background, the black metal would not show. This is a compromise.


I used the dried palm pod, below, in a demonstration recently over a container with two bottle necks, hence the two holes in the hard, dry material. I was able to use those holes for the arum lilies. The leaves are alstroemeria psittacina.


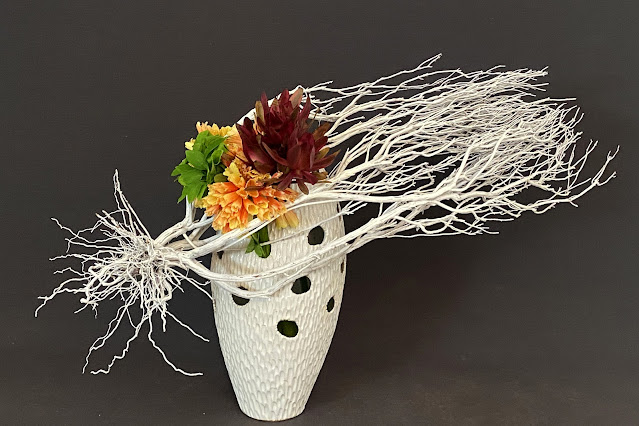
The white, dry material was much larger but broke up when it was tossed onto the lawn. Again, I picked it up intending to put it in the garden waste bin but saw potential and brought it inside instead. I used one of my favourite containers and created masses of clivia nobilis flowers, leucadendrons and alstroemeria psittacina leaves.


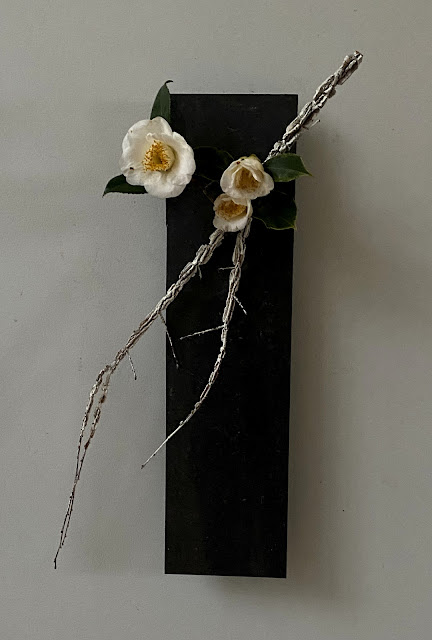
This small piece of sprayed, corky elm was found behind the bin, having escaped the fate of its companions, who ended up in the bin. The dark ceramic tile was a suitable foil for the white branch and camellias.


The photographs, below, are two views of the same, floor arrangement. The palm spathe already had a convenient hole in it from its previous use, making it easy to place over the tall, ceramic vase. A mass of Brushfield's yellow camellias was all that was needed to complete the piece. It reminds me of a lady wearing a bonnet with flowers on it.. The arrangement is as tall as me.


Bye for now,
Emily


Enjoyed this post? Never miss out on future posts by following us