Monday, 28 July 2025


Hello all,

The theme for the advanced students at our last class was 'Jika Dome', which means Direct Fixing. It is particularly suited to arrangements made in delicate containers that might break by the use of horizontal fixtures. It requires the bending of stems so that when they rest on the lip of the container, they don't twist out of position.

The arrangement, above, is mine. I chose this particular camelia because the stems bend without snapping. I added nandina domestica berries and a pendulous clivia, which is flowering either too early or too late.

Lucy's arrangement, below, is made with French broom, chrysanthemums and Dutch iris in a newly acquired basket.


Jenny used some branches I was not able to identify. (If anyone knows what they are, I'd be grateful if you'd send me a note to tell me). She added oriental lily buds and, somewhat unusually coloured, chrysanthemums.


Nicole used pussy willow branches (Salix caprea), nandina domestica nana and Dutch iris.


Vicky reused magnolia branches, which were thick and, therefore, difficult to bend, so she tried a technique called 'ori dome', where several partial cuts are made along the stem where it is to be bent. The oriental lilies finished the arrangement.


Cymbi also used camellias and added white statice and calendulas.


Having finished her class arrangement, Vicky made a freestyle one using an interesting piece of magnolia and nandina domestica berries. She trimmed the branch, emphasizing the right angle of the branch.


Wendy's curriculum theme was 'Arrangements for Celebrations'. The occasion she chose was a Birthday. She used fox tail ferns, which she curved, camelias and crocosmia in a footed suiban.


Bye for now,
Emily


Wednesday, 23 July 2025

MATERCLASS # 33


Hello all,

The plans I had for our recent masterclass were thrown out when Vicky rang to say that she and her husband were pruning back their kiwi vine. So, I dropped everything and drove down to collect enough cuttings for everyone in the class. I gave each student a piece of vine, a stem of oriental lilies in bud and some leaves. They were to chose their own container.

Mine is the arrangement, above. I made it a few days after the class, which explains my flower being fully open, when the students' ones were only in bud.

I made a second arrangement with a small piece of vine and my one and only arum lily. The glass vase is particularly beautiful and the challenge was to place the materials so that the stems in the water would be concealed by the coloured parts of the vase.


Cymbie used two containers, in one of which she placed the kiwi vine (not easy to balance in such a small container) and an aspidistra leaf in the other. She cut and used the stems only of her other aspidistra leaves and, very wisely, left out the flowers.

Akemi chose a container with an intricate design which she repeated by tying the ends of the New Zealand flax leaves. She, then, worked the vine through and around the leaves and added the flower buds as the focal point


Lei placed her, two, strelitzia reginae leaves top to bottom and brought the vine around, thus creating space, behind which she placed the flower buds.

Jenny chose a tall vase for her rather large piece of vine. She had two monstera leaves but chose to use only one. The three flower buds completed the naturalistic arrangement.


Vicky, also, used a tall vase but she made a contemporary arrangement draping downwards. She trimmed the leaves of the umbrella grass and bent the stems directing them downwards and through the space created by the vine.


Lucy's piece of vine was more challenging because it was quite thick and, therefore, less malleable. She managed, however, to place it in a pleasing manner over a heavy container, then placed one of her two philodendron leaves and the flower buds quite high, making them the focal point.


In the entry of our house we have a narrow wall, on which I always have an arrangement. I call it my 'welcome arrangement'. I find photographing these arrangements particularly frustrating. The two story, front entry is made of glass and light is flooded through the entry space but this creates shadows. I play around with the various lights, including portable, modeling lights but I'm never satisfied. 

Anyway, below is my current wall arrangement. I reused yellow dogwood (cornus sericea flaviramea), nandina domestica nana, queen's tears bromeliad and large New Zealand flax leaves. The photograph belies the size of the arrangement. It is, actually, 1.5 metres tall.


Bye for now,
Emily


Monday, 14 July 2025

GREEN PLANT MATERIALS


Hello all,

At last class I set the theme of 'Green Plant Materials' for the advanced students. In this lesson we use only green materials and avoid any, very obvious variegations or coloured stems. We choose materials of different textures, sizes and forms to create interest.

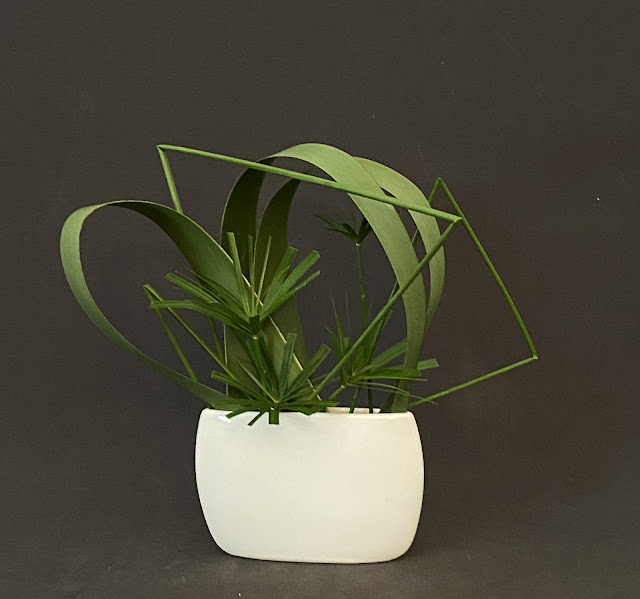
In my arrangement, above, I used gymea leaves (dorianthus palmeri), dietes and alstroemeria psittacina  leaves.

In her arrangement, below, Jenny used monstera deliciosa leaves, dietes leaves and the stems of umbrella grass in a ceramic container.


Lei used cypress, trimmed into a solid shape, much like a hedge, two strelitzia reginae leaves and aspidistra leaves in a container with two openings.


Cymbie's arrangement, below, is made up of a monstera leaf that was folded into itself, aspidistra leaves and umbrella grass.


Vicky used papyrus, which had been trimmed by possums into a rounded shape, a strelitzia reginae leaf and umbrella grass stems in a slate container made by her clever husband, Peter.

Nicole was quite quick with her arrangement, so was able to make a second one. In the first she used umbrella grass, dietes leaves and alstroemeria psittacina leaves....


.....In the second, she used umbrella grass, stems and flowers and New Zealand flax.


Mary's arrangement was 'kakebana', which is an arrangement in a container on the wall. She used red dogwood (cornus siberica alba) branches, dietes leaves and lisianthus flowers in a metal container.


A much loved tree this time of year is my Japanese flowering apricot (prunus mume), which flowers right smack in the middle of winter. I've been enjoying its delicate, fragrant blossoms in many ways. Below is one of them. The stem had an interesting shape to which I added the very first of my pink camellias. The container is one I made myself.


Bye for now,
Emily


Monday, 7 July 2025

RELEF WORKS


Hello all,

The advanced students were set the theme from Book 5 - 'Relief Works', where dried, bleached or coloured materials are arranged on a board, meant to be hung on the wall.

The photograph, above, is of my relief work. I used a painting canvas on which I glued mung beans and black beans and I wired wisteria vine and nandina domestica berries.

Mary, in her arrangement, below, used corrugated cardboard and dried leek flowers. 


Lei created an optical illusion with the gold coloured, magnolia branch, which looks as though it is coming through the board. The kanji characters on the paper were done by Lei. As a focal point she added purple statice.
    

Jenny created a white on white piece using wire and paper to create circles, then added white coloured, Japanese anemones after the petals had fallen. She added a subtle colour with the dried hydrangeas. 


Vicky used a fine squiggly stem and added dried hydrangea flowers and petals.


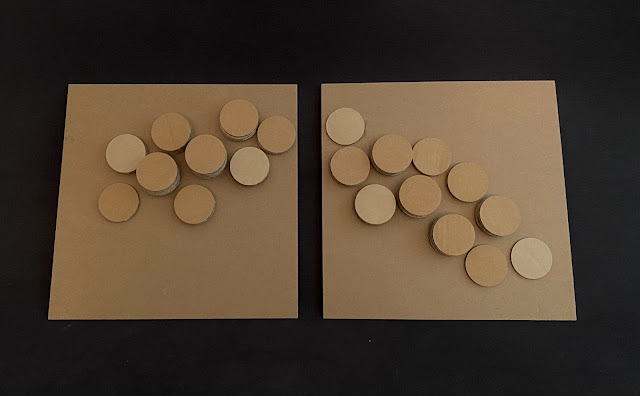
Lucy used cardboard discs stacked at different heights and with subtle difference in colour, on two boards.


Cymbie used three boards painted in different colours and joined together by a piece of bamboo. She also added a sprig of koala fern at the top.


My favourite camellia, the Kamo Hon Ami, is not doing as well this year as it has previously. However, I was able to cut a few stems to create the arrangement, below. To the uninitiated, it appears that I simply placed the stems in the vase. That's not quite right. It takes some skill and experience to place camellias correctly.


Bye for now,

Emily


Enjoyed this post? Never miss out on future posts by following us